
Working with KockoutJS bindings in magento 2

Today we will explore how we can work with the bindings in knockoutJS. Let us first talk about bindings.
1. The text binding
The text binding causes the associated element to display the text value. Typically this is useful with the elements like <span> or <em>
Before starting we need to create our component first. We’ve already discussed about creating a simple component. Click here to see the post
Edit your customViewModel component:
Know/Module/view/frontend/web/js/customViewModel.js
define([
    'uiComponent'
], function (Component) {
    "use strict";

    return Component.extend({
        heading: 'KO bindings',
        content: 'Lorem Ipsum is simply dummy text of the printing and typesetting industry.',

        getCustomText: function () {
            return "Custom text function concatenated with a variable text: " + this.content;
        }
    });
});
What we have done here is to remove the initialize function and added variables heading and content. Both contain a string value. Moreover we have also added a custom function `getCustomText()`. This function returns the string concatenated with a content variable.
Now open the template file and replace it with the following content:
Know/Module/view/frontend/web/template/custom-component-tpl.html
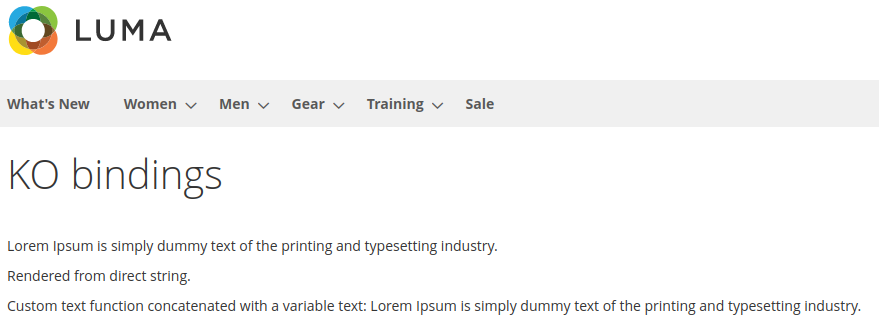
<h1 data-bind="text: heading"></h1>
<p data-bind="text: content"></p>
<p data-bind="text: 'Rendered from direct string.'"></p>
<p><span data-bind="text: getCustomText()"></span></p>
The text biding accepts a single string parameter. If integer is provided it will be still taken as a string by the binding.
In heading and first paragraph elements we are directly specifying the variables that we created earlier in the component. While in second paragraph element we are directly specifying the string (see the single quote for this). In last paragraph we have called a function which returns a string value.
The output should look like the screenshot below:
You can also pass an arbitrary javascript expression to the text binding. Open your customViewModel and add a getPrice function to it:
Know/Module/view/frontend/web/js/customViewModel.js
define([
    'uiComponent'
], function (Component) {
    "use strict";

    return Component.extend({
        heading: 'KO bindings',
        content: 'Lorem Ipsum is simply dummy text of the printing and typesetting industry.',

        getCustomText: function () {
            return "Custom text function concatenated with a variable text: " + this.content;
        },

        getPrice: function () {
            return 25;
        }
    });
});
Now open the custom-component-tpl.html template file and add the arbitrary expression to it:
Know/Module/view/frontend/web/template/custom-component-tpl.html
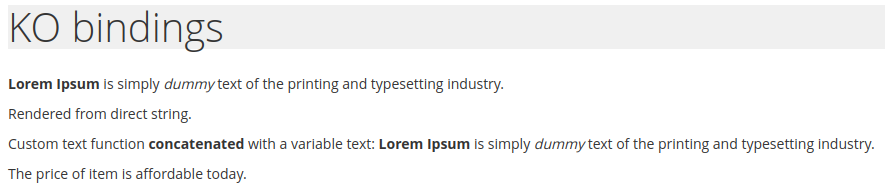
<h1 data-bind="text: heading"></h1>
<p data-bind="text: content"></p>
<p data-bind="text: 'Rendered from direct string.'"></p>
<p><span data-bind="text: getCustomText()"></span></p>
<p>The price of item is <span data-bind="text: getPrice() > 30 ? 'expensive' : 'affordable'"></span> today.</p>
The out will be similar to the screenshot below:

2. The “html” binding
The html binding causes the associated DOM element to display the HTML. This is useful for the text containing the html tags.
Open customViewModel component and add some html elements inside the content string.
Know/Module/view/frontend/web/js/customViewModel.js
define([
    'uiComponent'
], function (Component) {
    "use strict";

    return Component.extend({
        heading: 'KO bindings',
        content: '<strong>Lorem Ipsum</strong> is simply <em>dummy</em> text of the printing and typesetting industry.',

        getCustomText: function () {
            return "Custom text function <strong>concatenated</strong> with a variable text: " + this.content;
        },

        getPrice: function () {
            return 25;
        }
    });
});
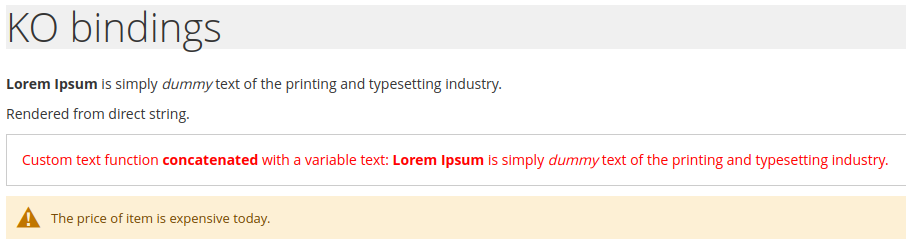
Again open the custom-component-tpl template file and replace some of the texthtml.
Know/Module/view/frontend/web/template/custom-component-tpl.html
<h1 data-bind="text: heading"></h1>
<p data-bind="html: content"></p>
<p data-bind="text: 'Rendered from direct string.'"></p>
<p><span data-bind="html: getCustomText()"></span></p>
<p>The price of item is <span data-bind="text: getPrice() > 30 ? 'expensive' : 'affordable'"></span> today.</p>
The output will be similar below:

3. The “class” and “css” bindings
The class and css bindings add or remove specified CSS classes to the associated DOM element.
The class binding accepts string parameter. Add a custom property to customViewModel component:
navSectionClass: 'nav-sections',
Edit the html template and add the class binding with a comma to heading. Specify the component property as an argument:
Know/Module/view/frontend/web/template/custom-component-tpl.html
<h1 data-bind="text: heading, class: navSectionClass"></h1>
<p data-bind="html: content"></p>
<p data-bind="text: 'Rendered from direct string.'"></p>
<p><span data-bind="html: getCustomText()"></span></p>
<p>The price of item is <span data-bind="text: getPrice() > 30 ? 'expensive' : 'affordable'"></span> today.</p>
The output on screen:
If we inspect using element inspector, we see the class attribute added to the DOM element:

For css binding you should pass a Javascript object in which the property names are css classes and their values evaluate to true or false according to whether the class should currently be applied.
Edit the custom-component-tpl and modify the last paragraph:
Know/Module/view/frontend/web/template/custom-component-tpl.html
<h1 data-bind="text: heading, class: navSectionClass"></h1>
<p data-bind="html: content"></p>
<p data-bind="text: 'Rendered from direct string.'"></p>
<p><span data-bind="html: getCustomText()"></span></p>
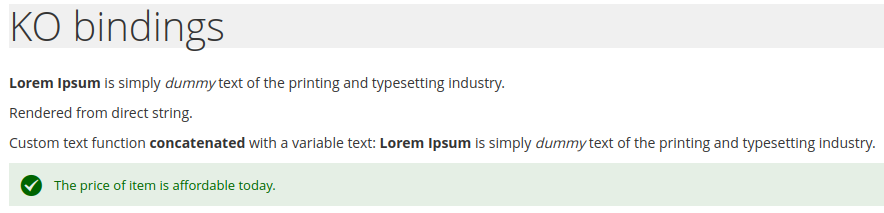
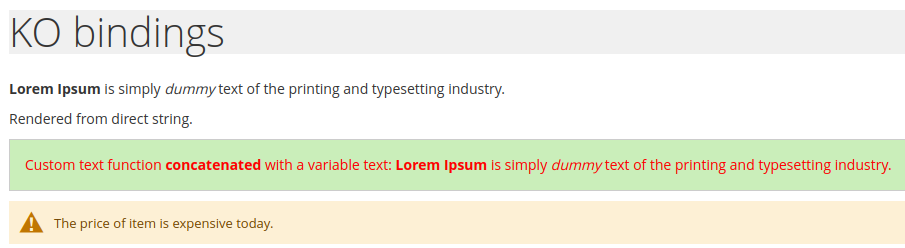
<p data-bind="css: { 'success' : getPrice() < 30 }, class: 'message'">The price of item is <span data-bind="text: getPrice() > 30 ? 'expensive' : 'affordable'"></span> today.</p>
The output should be similar to the screenshot below:
You can set different CSS classes based on the different conditions. Add a new condition with a comma inside you css binding:
Know/Module/view/frontend/web/template/custom-component-tpl.html
<h1 data-bind="text: heading, class: navSectionClass"></h1>
<p data-bind="html: content"></p>
<p data-bind="text: 'Rendered from direct string.'"></p>
<p><span data-bind="html: getCustomText()"></span></p>
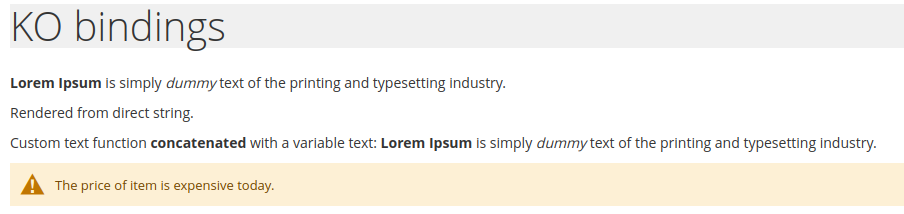
<p data-bind="css: { 'success' : getPrice() < 30, 'warning': getPrice() > 30}, class: 'message'">The price of item is <span data-bind="text: getPrice() > 30 ? 'expensive' : 'affordable'"></span> today.</p>
Now edit the customViewModel component and change the returning value of getPrice() function to 35.
getPrice: function () {
    return 35;
}
Now the output should change similar to the screenshot below:
4. The “style” binding
The style binding adds or removes one or more styles associated to the DOM element. A Javascript object should be passed in which the property names correspond to the style names, and values correspond to the styles. You can set multiple styles at once.
Edit the custom-component-tpl template file and modify the second last paragraph:
<p data-bind="style: { 'color': getPrice() < 30 ? 'green' : 'red', 'padding': '15px', border: '1px solid #ccc' }"><span data-bind="html: getCustomText()"></span></p>
The output looks like this:
If you want to apply styles whose names are not legal Javascript variable names, you can either put them in quotes or Javascript names for that style.
Again open the custom-component-tpl template file and add background to the second last paragraph.
<p data-bind="style: { backgroundColor: '#caeeba', 'color': getPrice() < 30 ? 'green' : 'red', 'padding': '15px', border: '1px solid #ccc' }">
<span data-bind="html: getCustomText()"></span>
</p>
The DOM element will look like below in element inspector:

5. The “attr” binding
The attr binding allows to set the value of any attribute associated with the DOM element. It is quick and easier when getting the attribute values from view model component.
Create a new property url inside the customViewModel component:
url: 'https://knowthemage.com',
Edit custom-component-tpl template file and add a new anchor element to it:
<a data-bind="attr: { href: url, title: 'My custom link'}, text: heading"></a>
It looks like below from element inspector:
![]()
The final changes in component and template looks like below:
Know/Module/view/frontend/web/js/customViewModel.js
define([
    'uiComponent'
], function (Component) {
    "use strict";

    return Component.extend({
        heading: 'KO bindings',
        content: '<strong>Lorem Ipsum</strong> is simply <em>dummy</em> text of the printing and typesetting industry.',
        navSectionClass: 'nav-sections',
        url: 'https://knowthemage.com',

        getCustomText: function () {
            return "Custom text function <strong>concatenated</strong> with a variable text: " + this.content;
        },

        getPrice: function () {
            return 35;
        }
    });
});
Know/Module/view/frontend/web/template/custom-component-tpl.html
<h1 data-bind="text: heading, class: navSectionClass"></h1>
<p data-bind="html: content"></p>
<p data-bind="text: 'Rendered from direct string.'"></p>
<p data-bind="style: { backgroundColor: '#caeeba', 'color': getPrice() < 30 ? 'green' : 'red', 'padding': '15px', border: '1px solid #ccc' }"><span data-bind="html: getCustomText()"></span></p>
<p data-bind="css: { 'success' : getPrice() < 30, 'warning':  getPrice() > 30}, class: 'message'">The price of item is <span data-bind="text: getPrice() > 30 ? 'expensive' : 'affordable'"></span> today.</p>
<a data-bind="attr: { href: url, title: 'My custom link'}, text: heading"></a>
The final output after applying all bindings:


2 Comments
Thank you!!!
You’re welcome. I am glad the post was helpful.