
How to create knockoutJS Observables in Magento 2
Today we will explore how to keep parts of a UI update automatically when related properties are changed. To achieve this we can use those related properties as observables.
Observables are special Javascript objects that can notify subscribers about changes, and can automatically detect dependencies.
Create a new module Know_Module
Know/Module/etc/module.xml
<?xml version="1.0" ?>
<config xmlns:xsi="http://www.w3.org/2001/XMLSchema-instance"
        xsi:noNamespaceSchemaLocation="urn:magento:framework:Module/etc/module.xsd">
    <module name="Know_Module" setup_version="1.0.0" />
</config>
Create registration.php: Know/Module/registration.php
<?php
\Magento\Framework\Component\ComponentRegistrar::register(
    \Magento\Framework\Component\ComponentRegistrar::MODULE,
    'Know_Module',
    __DIR__
);
For simplicity let us create the component inside home page. So go ahead and create cms_index_index.xml layout file and then create a block inside it.
Know/Module/view/frontend/layout/cms_index_index.xml
<?xml version="1.0"?>

<page xmlns:xsi="http://www.w3.org/2001/XMLSchema-instance"
      xsi:noNamespaceSchemaLocation="urn:magento:framework:View/Layout/etc/page_configuration.xsd">
    <body>
        <referenceContainer name="content">
            <block class="Magento\Framework\View\Element\Template" name="km.component"
                   template="Know_Module::component.phtml" />
        </referenceContainer>
    </body>
</page>
Now create the template file: Know/Module/view/frontend/templates/component.phtml
<?php
/**
 * @var \Magento\Framework\View\Element\Template $block
 */
?>

<div id="km-component" data-bind="scope: 'km-component-scope'">
    <!-- ko template: getTemplate() --><!-- /ko -->
</div>
<script type="text/x-magento-init">
    {
        "#km-component": {
            "Magento_Ui/js/core/app": {
                "components": {
                    "km-component-scope": {
                        "component": "Know_Module/js/view/km-component",
                        "config": {
                            "template": "Know_Module/kmtemplate"
                        }
                    }
                }
            }
        }
    }
</script>
The next step is creating km-component. Let us just create a simple component with a few properties in it.
Know/Module/view/frontend/web/js/view/km-component.js
define([
    'uiComponent'
], function (Component) {
    "use strict";

    return Component.extend({
        defaults: {
            heading: 'My heading stuff',
            content: '<strong>Lorem Ipsum</strong> is simply <em>dummy</em> text of the printing and typesetting industry.'
        }
    });
});
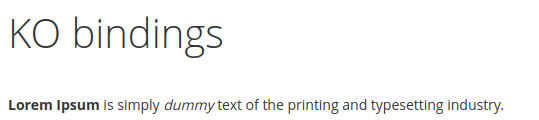
And the next important step is creating a html template file. Go ahead and create kmtemplate.html
Know/Module/view/frontend/web/template/kmtemplate.html
<h1 data-bind="text: heading"></h1>
<p data-bind="html: content"></p>
In order to use knockout observables we will require to add ko dependency inside km-component. Using ko instance we will specify observable object to read or write the values. Now the difference with normal properties is that these properties are capable of detecting change in their values, hence they will automatically update the layout.
For compatibility purposes the observable objects are actually function. So when we need to call the property, we call it like a function by specifying parenthesis.
Writing observables
To write an observable property value, just call the observable property and pass a parameter to it. Edit the km-component file and specify the following content inside:
Know/Module/view/frontend/web/js/view/km-component.js
define([
    'uiComponent',
    'ko'
], function (Component, ko) {
    "use strict";

    return Component.extend({
        defaults: {
            heading: ko.observable('My heading stuff'),
            content: ko.observable('<strong>Lorem Ipsum</strong> is simply <em>dummy</em> text of the printing and typesetting industry.')
        }
    });
});
The data binding with both properties will work in same way, but now these values are capable of detecting and writing changes on front-end.
Reading observables
To read observable current value, call the observable property with no parameters. Since we are reading these observables inside the kmtemplate.html so our changes will inside the template file this time.
Know/Module/view/frontend/web/template/kmtemplate.html
<h1 data-bind="text: heading()"></h1>
<p data-bind="html: content()"></p>
In code above we have specified the text and html attribute observable properties. Doing so register themselves to be notified when value is changed.
The output is similar to the normal properties output so far:
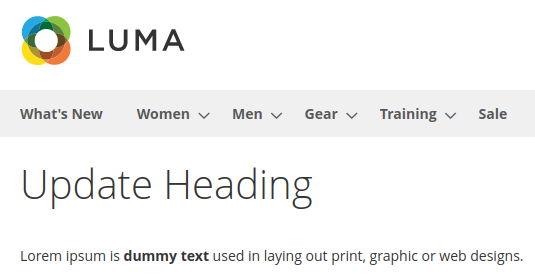
Writing multiple observable properties
To write multiple observable properties at once, use the chaining syntax. Create initialize function and specify the property new value inside it.
define([
    'uiComponent',
    'ko'
], function (Component, ko) {
    "use strict";

    return Component.extend({
        defaults: {
            heading: ko.observable('My heading stuff'),
            content: ko.observable('<strong>Lorem Ipsum</strong> is simply <em>dummy</em> text of the printing and typesetting industry.')
        },

        initialize: function () {
            this._super();
            this.heading("Update Heading").content('Lorem ipsum is <strong>dummy text</strong> used in laying out print, graphic or web designs.');
        }
    });
});
The output will be similar to the screenshot below:
Subscribing to observables
Since knockout already has build-in-bindings and templating system which take care of subscriptions, so we do not normally need to specify the custom subscription. However there could be cases when we can specify the custom subscription.
The subscribe function accepts three parameters:
- callback: is a called when the notification happens
- target: is optional and defines the value of current model instance in callback function
- event: is the name of event to receive notification for. The default value is change and is optional.
Go ahead and edit the component km-component
Know/Module/view/frontend/web/js/view/km-component.js
define([
    'uiComponent',
    'ko'
], function (Component, ko) {
    "use strict";

    return Component.extend({
        defaults: {
            heading: ko.observable('My heading stuff'),
            content: ko.observable('<strong>Lorem Ipsum</strong> is simply <em>dummy</em> text of the printing and typesetting industry.'),
            counter: ko.observable(0)
        },

        initialize: function () {
            this._super();
            this.heading("Update Heading").content('Lorem ipsum is <strong>dummy text</strong> used in laying out print, graphic or web designs.');
            this.content.subscribe(function () {
                this.counter(
                    document.getElementById('custom_input').value.length
                );
            }, this);
        },
       onChangeInput: function () {
            let inputVal = document.getElementById('custom_input').value;
            this.content(inputVal);
        }
    });
});
Now edit the kmtemplate.html template file.
<h1 data-bind="text: heading"></h1>
<p data-bind="html: content"></p>
<input data-bind="attr: {
    type: 'text',
    placeholder: 'Modify the paragraph text',
    id: 'custom_input'
}, event: {
    keyup: onChangeInput
}"/>
<p data-bind="attr: { id: 'counter' }, text: 'Input characters: ' + counter()"></p>
In template we have specified an event binding inside input field and specified the keyup event. The keyup event calls custom event onChangeInput on it. Using this function we update the content value similar to our input.
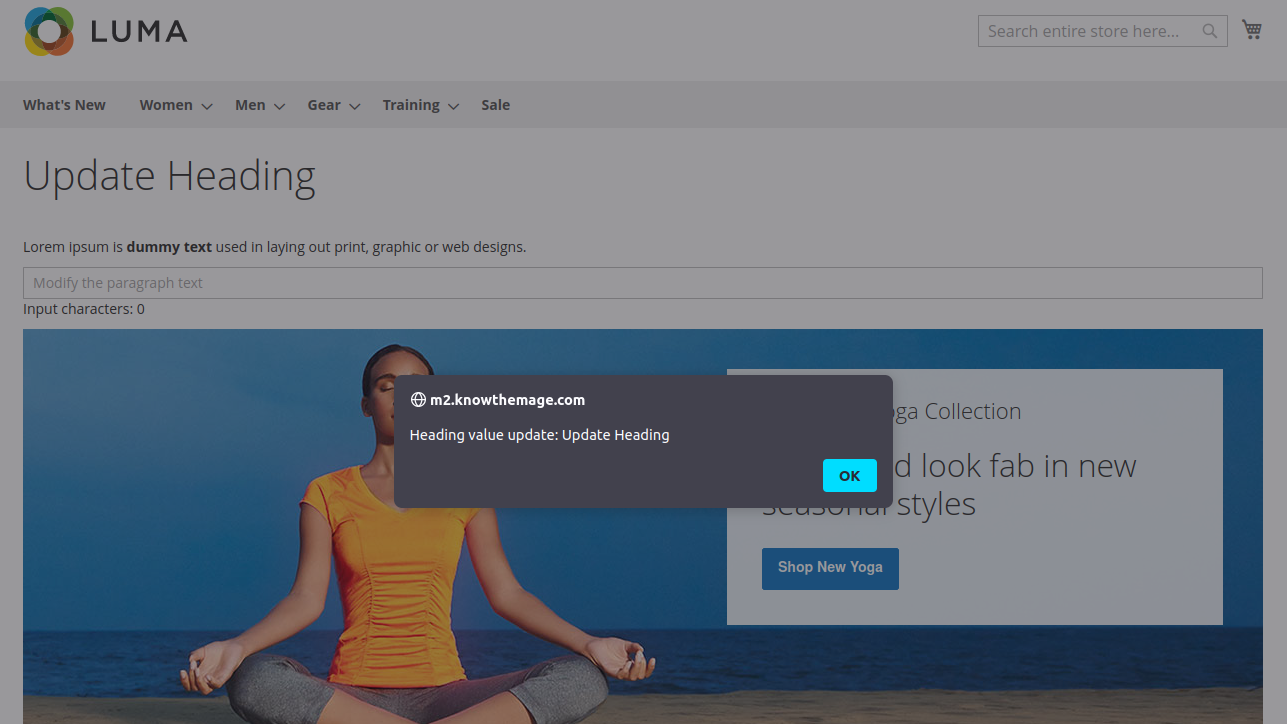
Always notify subscribers
Observables are normally only notified if the value actually change. If value is similar value the subscriber will not be notified. However We can force observables to always notify subscribers. To ensure that we should use built-in always extender. This will always notify the subscribers even the value is similar.
An extender should be applied to the observable property like this:
this.heading.extend({ notify: 'always' });
According to the code above, the subscriber will always be notified no matter what value it had. Go ahead and add always extender under the initialize function, so it should be declared once. We would use setTimeout function to push a change with a delay.
Know/Module/view/frontend/web/js/view/km-component.js
define([
    'uiComponent',
    'ko'
], function (Component, ko) {
    "use strict";

    return Component.extend({
        defaults: {
            heading: ko.observable('My heading stuff'),
            content: ko.observable('<strong>Lorem Ipsum</strong> is simply <em>dummy</em> text of the printing and typesetting industry.'),
            counter: ko.observable(0)
        },

        initialize: function () {
            this._super();
            this.heading("Update Heading").content('Lorem ipsum is <strong>dummy text</strong> used in laying out print, graphic or web designs.');
            this.content.subscribe(function () {
                this.counter(
                    document.getElementById('custom_input').value.length
                );
            }, this);

            let self = this;
            // Push change with similar value after 6 seconds.
            setTimeout(function () {
                self.heading("Update Heading");
            }, 6000);

            // Add Heading subscriber
            this.heading.subscribe(function (newValue) {
                alert("Heading value update: " + newValue);
            });

            // Always notify the subscriber
            this.heading.extend({
                notify: 'always'
            });
        },
        onChangeInput: function () {
            let inputVal = document.getElementById('custom_input').value;
            this.content(inputVal);
        }
    });
});
Flush the cache and remove static content. The changes will look similar to the screenshot below:
Delaying change notifications
An observer normally notifies its subscriber immediately as soon a change occurs. But if there are repeated changes or expensive updates, we can get performance out of it, by limiting the observer’s change notifications. This can be achieved by using rateLimit extender.
this.heading.extend({ rateLimit: 45 });
The code above ensures about changes no more than once per 45-miliseconds period. Now edit the km-component and make some changes to observe the rate limiting.
Know/Module/view/frontend/web/js/view/km-component.js
define([
    'uiComponent',
    'ko'
], function (Component, ko) {
    "use strict";

    return Component.extend({
        defaults: {
            heading: ko.observable('My heading stuff'),
            content: ko.observable('<strong>Lorem Ipsum</strong> is simply <em>dummy</em> text of the printing and typesetting industry.'),
            counter: ko.observable(0)
        },

        initialize: function () {
            this._super();
            this.heading("Update Heading").content('Lorem ipsum is <strong>dummy text</strong> used in laying out print, graphic or web designs.');
            this.content.subscribe(function () {
                this.counter(
                    document.getElementById('custom_input').value.length
                );
            }, this);

            let self = this;
            // Push change with similar value after 6 seconds.
            setTimeout(function () {
                self.heading("Update Heading").content('New content change');
            }, 6000);

            // Add Heading subscriber
            this.heading.subscribe(function (newValue) {
                alert("Heading value update: " + newValue + ' and content is: ' + this.content());
            }, this);

            // Always notify the subscriber
            this.heading.extend({
                notify: 'always',
                rateLimit: 45 // Ensure the change happened once within 45 miliseconds period.
            });
        },
        onChangeInput: function () {
            let inputVal = document.getElementById('custom_input').value;
            this.content(inputVal);
        }
    });
});
We have add the chaining syntax inside the setTimeout function, so we update the content along with updating the heading.
Moreover we have also concatenated the content observable to see the output.
Without specifying rateLimit we will observe the previous content is still appearing. This happened because the content subscriber works after the heading subscriber. However as soon we added the rateLimit we were able to see the changed value of content observable.
The output will be similar to the screenshot below:
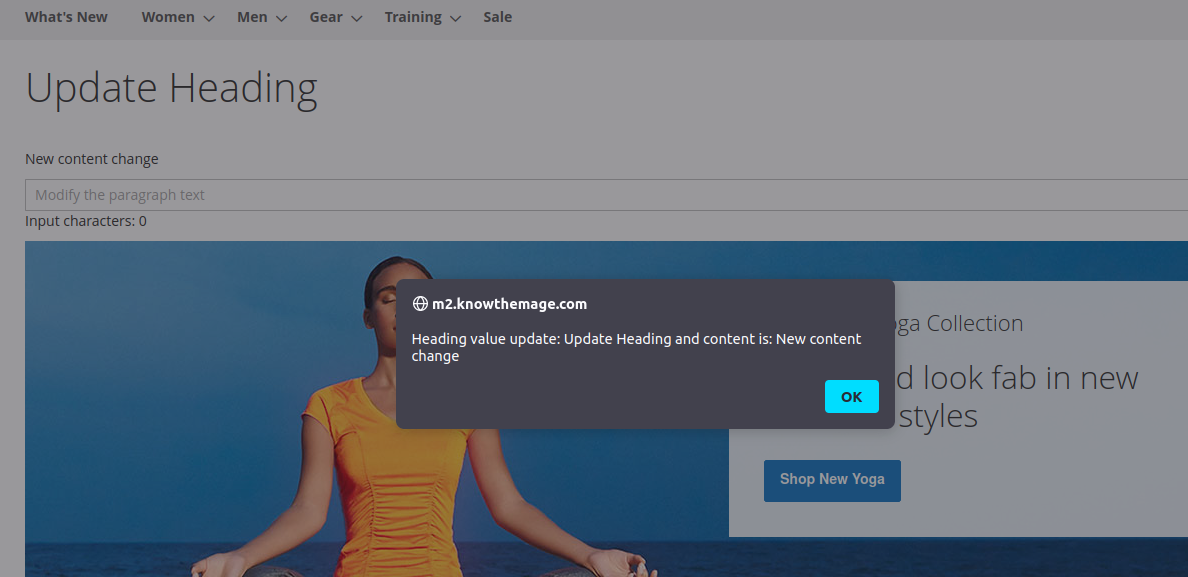
Using observable between components
We can make the observables more useful by creating a separate view model returning the observable. Then this observable view model can be used in different components by injecting as a dependency. Writing its value in a component allow other components to read the modified value from this observable.
Now go ahead and create counter.js under model directory:
Know/Module/view/frontend/web/js/model/counter.js
define([
    'ko'
], function (ko) {
    "use strict";

    return ko.observable(0);
});
Inside this view model we created, initialized and returned the observable property. We will use view model inside our components.
Next open the km-component component file, add the counter as a dependency and assign it to the counter property. Moreover we will write counter view model value this time whenever content changes.
Know/Module/view/frontend/web/js/view/km-component.js
define([
    'uiComponent',
    'ko',
    'Know_Module/js/model/counter'
], function (Component, ko, Counter) {
    "use strict";

    return Component.extend({
        defaults: {
            heading: ko.observable('My heading stuff'),
            content: ko.observable('<strong>Lorem Ipsum</strong> is simply <em>dummy</em> text of the printing and typesetting industry.'),
            counter: Counter // Assign the counter observable view model.
        },

        initialize: function () {
            this._super();
            this.heading("Update Heading").content('Lorem ipsum is <strong>dummy text</strong> used in laying out print, graphic or web designs.');
            this.content.subscribe(function () {
                // Modify the change to the observable view model.
                Counter(
                    document.getElementById('custom_input').value.length
                );
            }, this);

            let self = this;
            // Push change with similar value after 6 seconds.
            setTimeout(function () {
                self.heading("Update Heading").content('New content change');
            }, 6000);

            // Add Heading subscriber
            this.heading.subscribe(function (newValue) {
                console.log("Heading value update: " + newValue + ' and content is: ' + this.content());
            }, this);

            // Always notify the subscriber
            this.heading.extend({
                notify: 'always',
                rateLimit: 45 // Ensure the change happened once within 45 miliseconds period.
            });
        },
        onChangeInput: function () {
            let inputVal = document.getElementById('custom_input').value;
            this.content(inputVal);
        }
    });
});
To really see the use of creating the observable view model, we need to create another child component and render the counter value there. So go ahead and create another child component. Open components.phtml template file and modify its content:
Know/Module/view/frontend/templates/component.phtml
<?php
/**
 * @var \Magento\Framework\View\Element\Template $block
 */
?>

<div id="km-component" data-bind="scope: 'km-component-scope'">
    <!-- ko template: getTemplate() --><!-- /ko -->
</div>
<script type="text/x-magento-init">
    {
        "#km-component": {
            "Magento_Ui/js/core/app": {
                "components": {
                    "km-component-scope": {
                        "component": "Know_Module/js/view/km-component",
                        "config": {
                            "template": "Know_Module/kmtemplate"
                        },
                        "children": {
                            "counter-component": {
                                "component": "Know_Module/js/view/counter-component",
                                "config": {
                                    "template": "Know_Module/counter-template"
                                },
                                "displayArea": "counter-component"
                            }
                        }
                    }
                }
            }
        }
    }
</script>
Now create the counter-component component.
Know/Module/view/frontend/web/js/view/counter-component.js
define([
    'uiComponent',
    'Know_Module/js/model/counter'
], function (Component, Counter) {
    "use strict";

    return Component.extend({
        defaults: {
            count: Counter
        }
    });
});
Create the counter-template template file.
Know/Module/view/frontend/web/template/counter-template.html
<p data-bind="attr: { id: 'counter2' }, html: '<strong>Count 2</strong>: ' + count()"></p>
And finally we need to modify the kmtemplate.html parent template file and render the child template based on its display area
Know/Module/view/frontend/web/template/kmtemplate.html
<h1 data-bind="text: heading"></h1>
<p data-bind="html: content"></p>
<input data-bind="attr: {
    type: 'text',
    placeholder: 'Modify the paragraph text',
    id: 'custom_input'
}, event: {
    keyup: onChangeInput
}"/>
<p data-bind="attr: { id: 'counter' }, text: 'Input characters: ' + counter()"></p>
<!-- ko foreach: getRegion('counter-component') -->
<!-- ko template: getTemplate() --><!-- /ko -->
<!--/ko-->
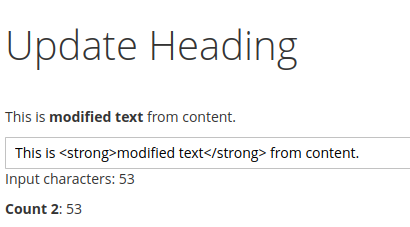
Flush the cache and clear the static content. Modify the input field value and the output will be similar to screenshot below:


2 Comments
Amazing Tutorials !!! Thanks for this superb contribution.
Please create more blog on KO with Magento2
Sure, more tutorials are in queue and will be published soon.